pylon vTools: Calibration & Rectification
Camera calibration to precisely convert pixel coordinates to real-world coordinates
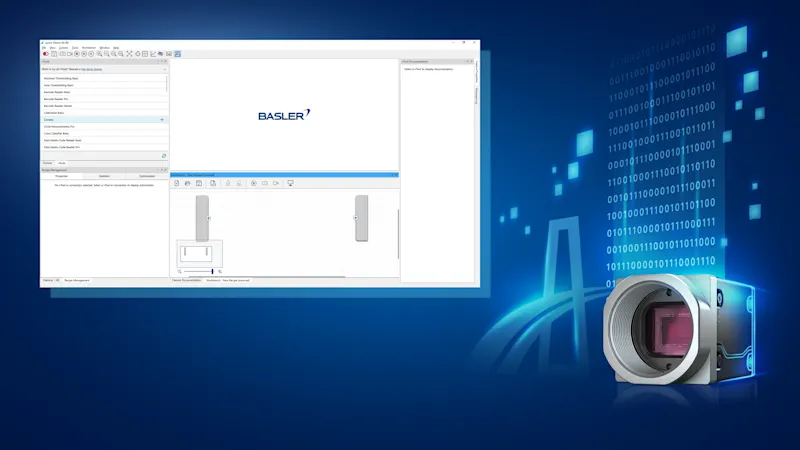
In this tutorial, we convert the vTool Calibration & Rectification procedure into a recipe and translate the pixel coordinates of the camera into real world coordinates. Also included: rectifying radial and perspective distortion effects that might be caused by camera settings.
Creating the recipe
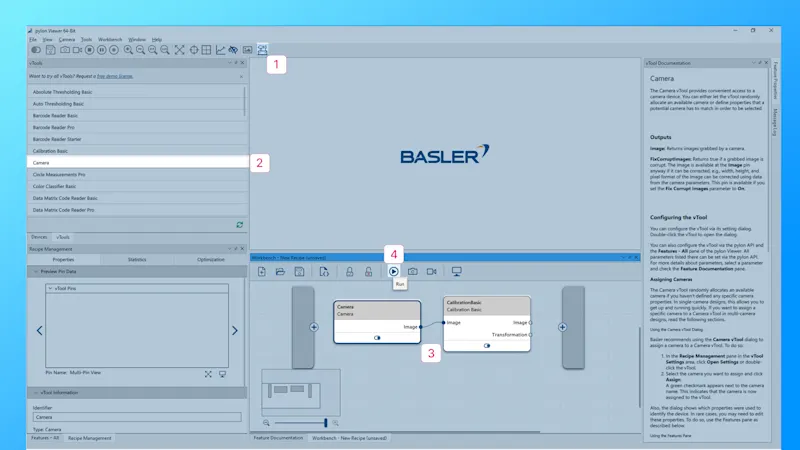
Access the workbench from the top menu.
Create a simple recipe featuring a Camera vTool and a Calibration vTool, either using the vTool pane on the left or by right-clicking on the Workbench pane.
Easily connect the Image output pin of the Camera vTool and the Image input pin of the Calibration vTool.
Select the Camera vTool and click Run to utilize the live camera image for calibration.
Tip: When editing an existing recipe, remember to Stop the currently running recipe.
The calibration process
Double-click the Calibration vTool to open the settings dialog and start the calibration process.
The calibration requires a calibration plate.
Select a calibration plate from the dropdown list that matches the size of your camera's field of view.
If you don't have a printout already, print it in its actual size and affix it to a sturdy, flat surface (such as an aluminum plate or thick cardboard) for optimal results.
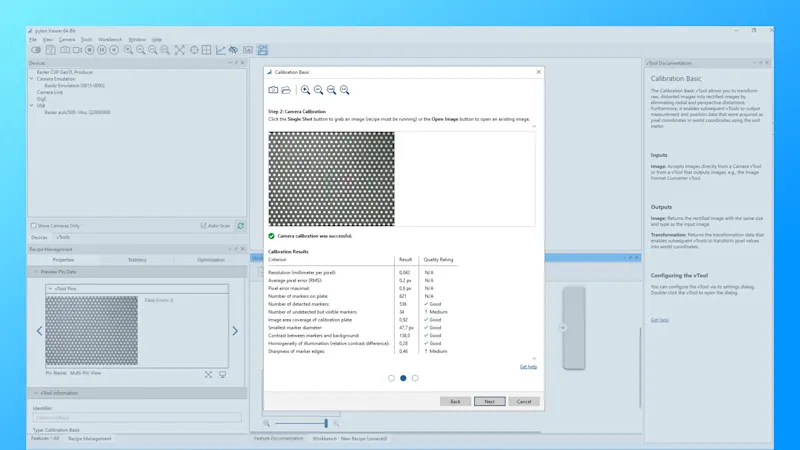
Position the calibration plate within the camera's field of view at the same distance as your objects.
Click Next and Capture an image of the calibration plate.
The calibration process starts automatically, and upon completion, you can directly see the results.
Click Next and OK to return to your Recipe.
Tip: If using an existing image, ensure it was captured under the same conditions as your current setup to ensure accurate results.
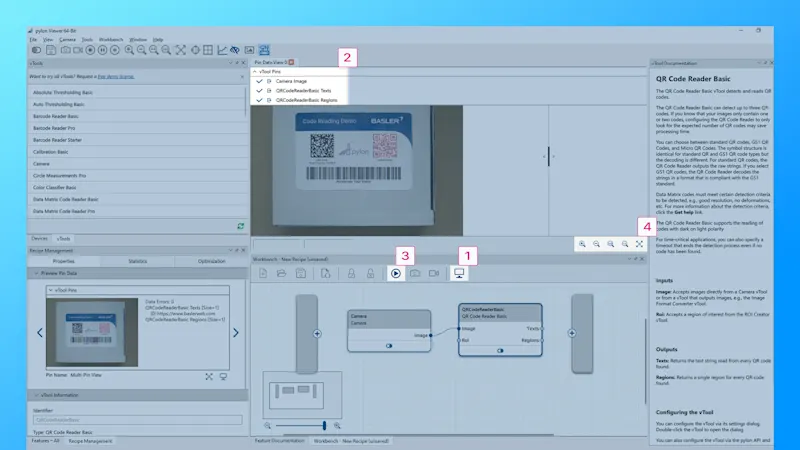
Pin Data View
To take a closer look at the vTools result in a recipe, open the Pin Data View.
Select all pins of interest.
Run the Recipe to see the results.
Adjust the Pin Data View View Settings as needed. Detailed results are displayed next to the output image.
Tip: Not all pins are selected by default.
Interested in pylon vTools and want to try them out?
Request a free trial license now so you can test all the vTools with the full range of features and find out which vTools solve your vision tasks.
Try pylon vTools for freeMore tutorials on pylon vTools
pylon vTools
Flexible software add-ons for industrial image processing
With the modular pylon vTools, you don't need to purchase a full vision library; instead, you select only the image processing functions required, using either AI-based or classic algorithms. Choose the appropriate license – Starter, Basic, or Pro – to access the range of features that best suit your needs.
